Expenses – in the wrong hands, a certain way to failure, in the right ones, however, a clever tool to balance your income. We know how tedious expense management might be, with all the receipts, invoices (btw do you know what does a professional invoice look like?) – paper or otherwise – that’s why our developers designed Billdu to keep this area of finances in order and at your immediate disposal. Read on, for a closer look at how simple it is to manage your expenses, both at home and also on-the-go.
Keeping a clear overview of all your expenses can be one hell of a task and almost everyone is to lazy or otherwise occupied to do so completely and effectively. Well, Billdu can certainly help you if you fall into that category.
Billdu Expenses Mobile
You no longer have to keep each and every receipt you get, just save it with Billdu’s receipt scanner (iOS and Android mobile version), your receipt will be synchronized with the online version where you can view all your expenses and much more, but we’ll get to that later.
Open your Billdu App and select Receipt scanner from the main menu. Now you can choose to upload a picture of the receipt from your gallery or to take a fresh one then and there. Add all the necessary basic info(expense name, price, date and category) and click save. There – done.

If you often receive invoices and receipts via mail as PDFs you can now easily save them to your Billdu account, directly from your mail app. Just tap on “open with” and select Billdu. The PDF gets sent to the Billdu app, wherein you can again add the basic information and save it.

If you haven’t already, download Billdu for you iOS device right now.
Billdu Expenses Web
At home,using your computer and Billdu, you can manage your expenses even more comfortably and effectively. Just select the Expenses option from the main menu and you can begin. If you saved any receipts using the mobile receipt scanner, each one of them will be displayed here in the grid, along with their respective basic information for an instant overview of all your recent costs.
We have added the option for our users to switch between different grid views, namely a classic list, with expenses shown in rows or you can try out the advanced view, with which you see a list of expenses with only the most important information(name of the expense, price and date) and next to it a preview of what the receipt actually looks like along with all the additional information you provided for the expense.
In both grid-views, you can filter your expenses either by status(whether they’re paid, unpaid or overdue) or by time – either select a time period(this year, this month etc.) or set a custom one that suits your needs. Additionally, you can filter all your expenses by category. With three different kinds of filters, you should have no problem looking up any expense that comes into your mind.
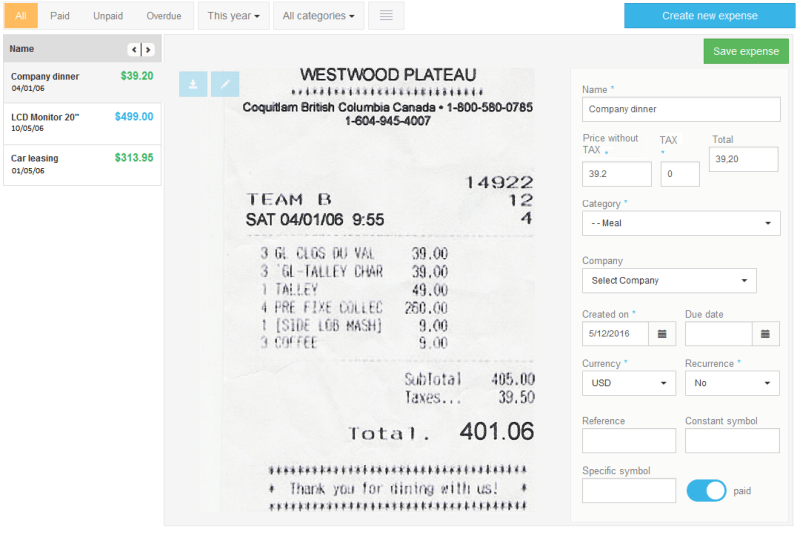
Expenses section on Billdu webpage – bill detail
Naturally, you can also add a new expense here with a simple click on Create new expense. Add your receipt as an image or PDF, enter all the information regarding the given expense, save and done. The expense can be edited, duplicated and of course, deleted. Also, if you so wish, you have the option to export all your expenses for further processing or safekeeping. Currently, Billdu supports the export of CSV and XLS, but you can also choose to export the attachments(the PDFs or images) only, which gives you a zip with all the receipts you’ve uploaded. Be careful, the export only exports the expenses that are currently “visible” via the chosen filter, so you have to be conscious of which expenses are meant to be exported when doing so.
If you paid attention to the subsections of the Expenses in our main menu, you surely noticed the Recurring expenses subsection and the Categories subsection. In Categories – big surprise – you can add, edit or remove expense categories according to your needs. In recurring expenses, you can set up expenses that have some kind of regularity(monthly office rent for example) and let Billdu add them automatically for you, every month(or a different interval, depending on your settings). This is a perfect option for users, that have a lot of regular bills, which don’t change their price or items, just their date.
If you haven’t gotten around to thoroughly checking out the expenses section, take a few minutes to do so. You”ll be surprised how much easier it is to manage all your outgoing cash flow. And if you have something that you would like to see in future updates regarding expenses(and otherwise of course), feel free to leave us a comment below.
Lately, our developers have been working their fingers off to bring you new features every month and they haven’t strayed from that path. This time, it’s a clever little gem for the mobile versions of Billdu – a barcode scanner. Users with a large inventory are struggling when trying to add the correct items to their invoices. Well, our developers have made it a whole lot easier for everyone. Read on, for insights regarding Billdu’s new barcode scanner function.
So, up until now, the “flow” of adding new items to you inventory in Billdu and consequently placing them on your invoices looked as follows: you entered all information about the given item and saved it. Then you could add it to an invoice by selecting it from a list of ALL your products within the invoice creation screen. In some cases, not a problem, but what if your inventory goes into the hundreds or even thousands? That many different products can be a pain to scroll through or even search by name. So how to solve this?
While saving a new product, you can now tap the barcode scanner icon, which lets you scan the barcode of your product. This information is then saved with everything else about your product and can be used later on. But first, you’ve got to set it up. Pretty easy actually, you just go into the settings of your Billdu mobile app, find the ON/OFF toggle for the barcode scanner under “Document settings” and turn it on.
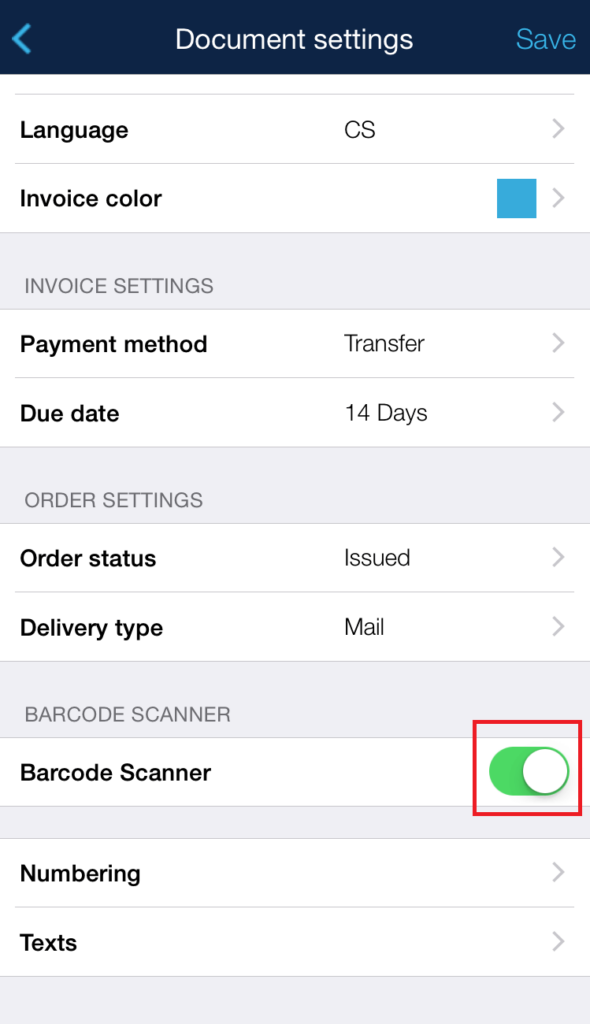
The barcode scanner is now ready to use and will appear in the instances: when adding and editing a product to your inventory, and when adding a product to your invoice. Let’s do a step-by-step of the former:
1. Open your Billdu app and tap on the Products section in the main menu.
2. Enter the product’s name, quantity and unit price, then tap the barcode icon on the right. You’ll be taken to a screen that looks like your camera app, with the absence of any buttons or the camera’s trigger. The scanner scans any barcode within the field of view of your phone’s camera(it doesn’t even have to be horizontally/vertically aligned with your phone) and captures it automatically when you point the camera towards it.
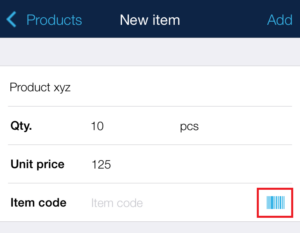
3. The item’s code is now filled in the proper field and can be saved.
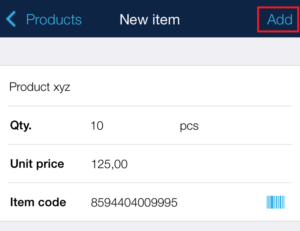
Simple right? You can literally feel the satisfaction as you hear the small “beep” sound as the barcode is scanned. Now, on to the second instance of the barcode scanner’s usage – adding saved items to a new invoice. Again, let’s do step-by-step:
1. Go to the Documents section and choose to create a new invoice, like you would normally. Select a client and add details(dates, currency, payment method, discount etc.)
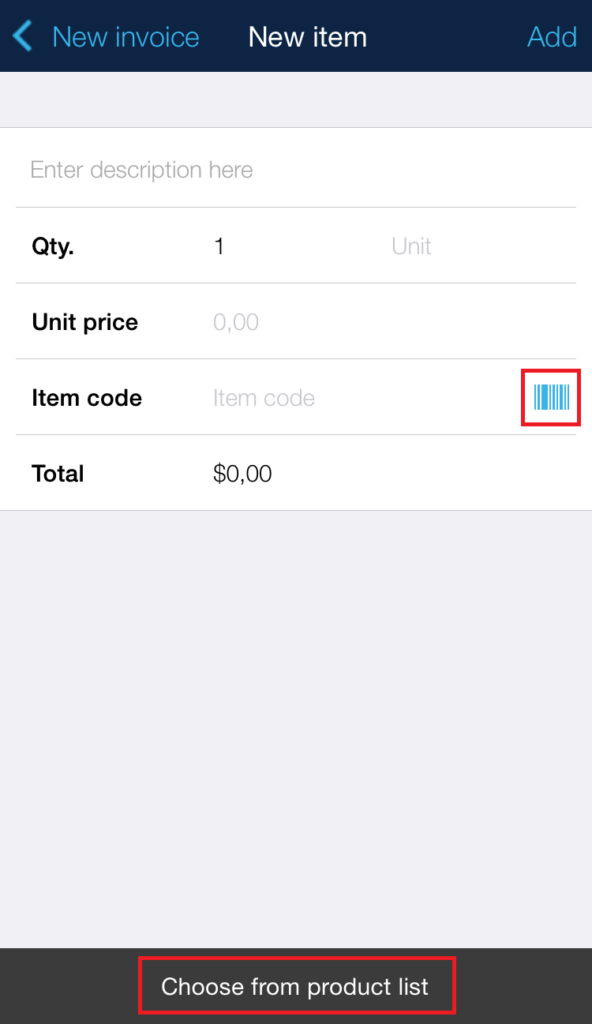
2. Now tap the items row to begin adding your products to the invoice. You will notice a new field called “Item code” along with the same barcode icon you’ve already seen when saving new products to your inventory. You can either tap the barcode icon directly or enter the product list, where you can also tap a barcode icon. In both cases, you will be able to scan the barcode of any product you’ve got at hand. Should it be a previously saved product from your inventory, all additional product data will be filled for you otherwise, you’ll have to fill out the missing fields before adding the product to your new invoice. Warning! If you add a completely new item to our new invoice in this way, the item itself will not be saved to your inventory(the items use is “one-time-only”, for the current invoice you’re creating.
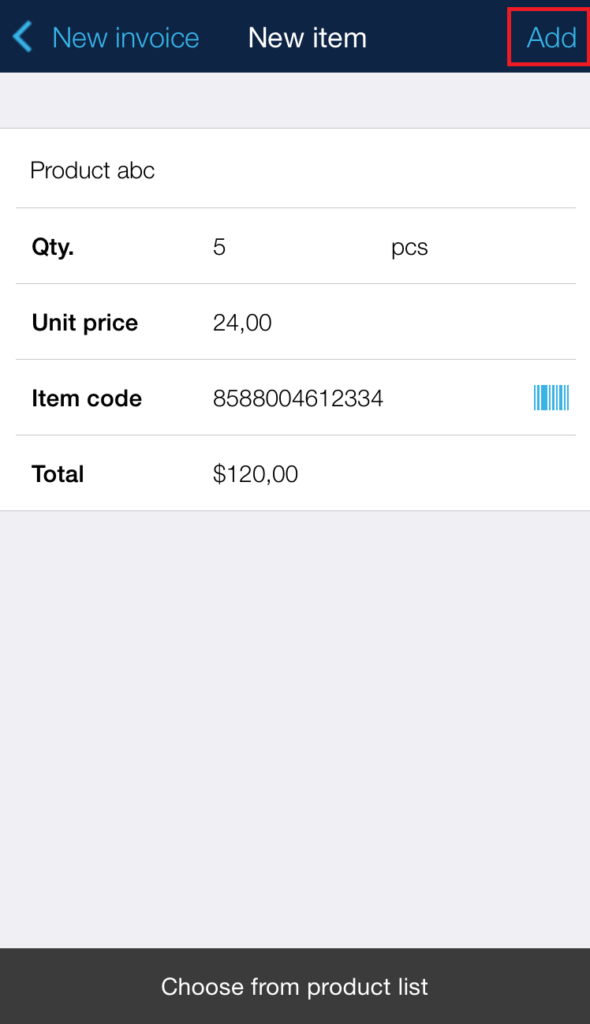
3. With an item selected, just tap “Add” and you’ll good to go.
The barcode scanner is available for the iOS versions of Billdu and can be used without any additional charges.
So what do you think of our handy new feature? Tell us in the comments below and should you have any ideas or remarks concerning the improvement of Billdu, do not hesitate to share them with us. Also, you might want to read this article revealing the 10 most important parts of any invoice.