No matter if you’re writing your first invoice or if you’re a pro at sending them out, it’s essential that you know how to put together a proper invoice. There are several sections you have to write out and fill in one by one. And, missing one can leave your business looking unorganized and unprofessional. You can use one of the free templates we offer to write your invoice, or you can use our simple invoice generator.
Writing out dozens of invoices can get a bit tedious. And, you can actually spend more time filling them out to get them ready to send than you do your daily tasks. This is where Billdu’s software can help you. The features you’ll find allow you to spend less time on tedious paperwork and more time focusing on other areas of your business. Learn how to write an invoice quickly and efficiently – here’s how you can set up a simple and professional invoice with Billdu.
Step One – Personalize It

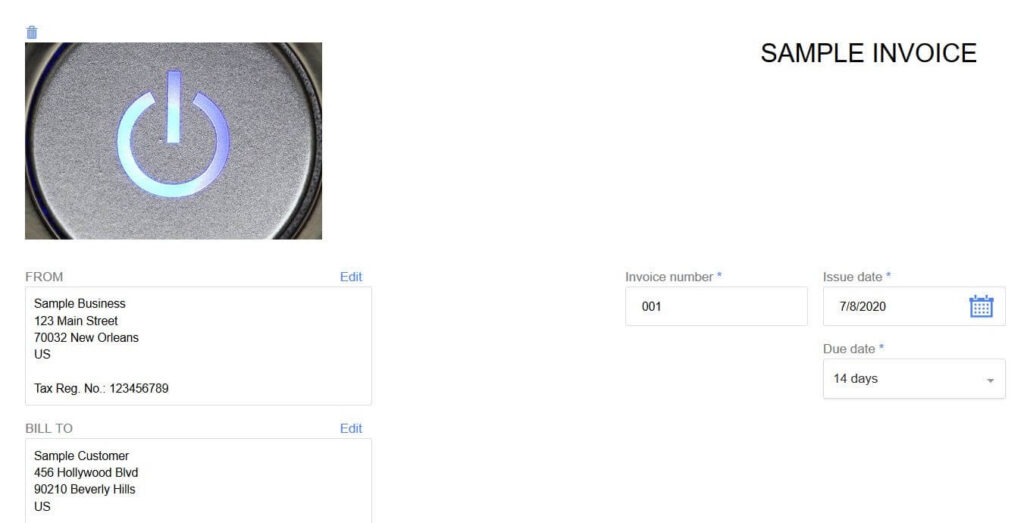
The first thing you want to do is personalize your invoice. You can do this by clicking the “Edit settings” up in the upper right corner of the template, right below the “Send by Email” button. When you click it, a box will open that allows you to pick the language, document color, tax label, currency, and the template you want to use. Once you get that all picked out, you can click “Save Changes.” Next, you’ll upload your logo by clicking on the “Add your logo” box in the upper left corner. You can also rename the “Invoice” box to whatever you like.
Step Two – Fill In Your Contact Information
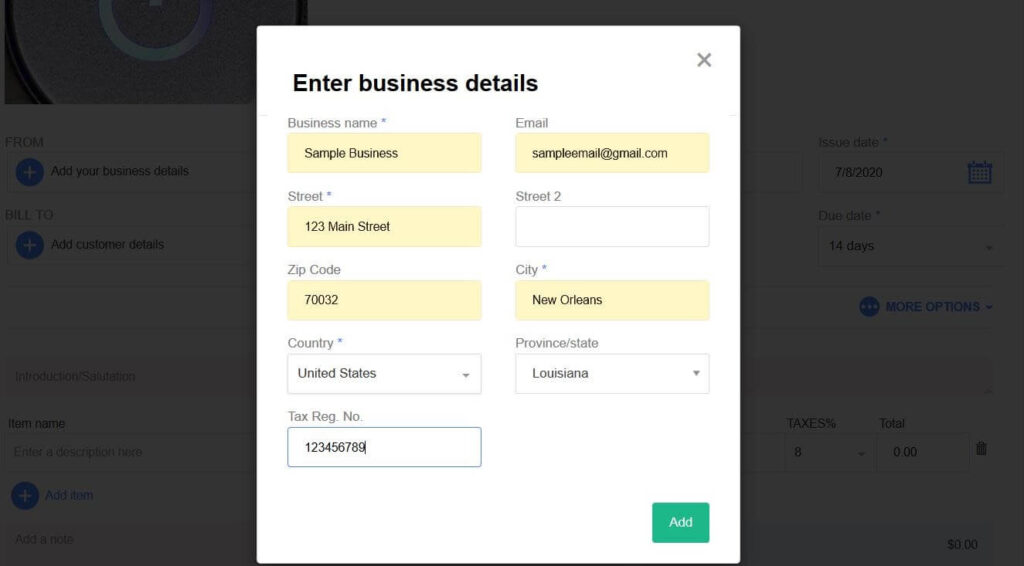
Once you get everything nicely personalized, it’s time to start filling in your business’s relevant contact information. With the invoice generator, you’ll notice that there is a red box that calls your attention to the business details box. If you click the “+” sign, a box will open and allow you to fill in:
- Business name
- Street
- Zip code
- City
- Country
- Province/state
- Tax reg number

When you fill all of this information in, you can click “Add” and the invoice generator will populate the fields for you.

Next, a red box will pop up and ask you to fill in the customer’s details. If you click on the “+” sign again, you’ll fill in the customer’s billing name, email address, street, zip code, city, state or province, country, and tax reg number if they have one. When you finish, the generator will populate whatever you put into it.

At this stage, you should also update your invoice number, the issue date, and the due date before moving onto the next stage.
Step Three – Fill In Your More Options Field
Right below the “Bill To” field, you’ll see a “More Options” button. If you click on it, a small segment of your invoice will open. This is where you fill in the reference number, order number, payment method, and any discounts you’re giving your customer.
Step Four – Fill In Your Items
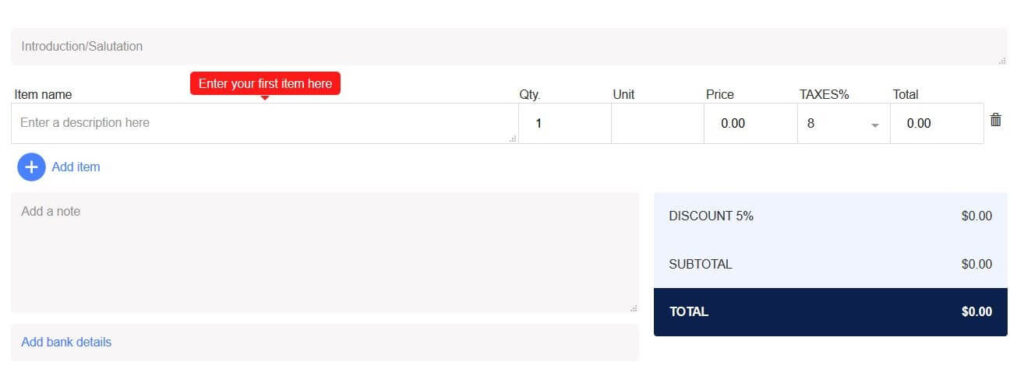
There is a small introduction/salutation field you can fill in before you jump into filling in your items on Billdu’s invoice generator. The first thing you want to enter is the item name. This is a short description of the service or product you provided. Next, you’ll fill in the quantity, price, and tax amount. The generator will automatically calculate the total for you. If you’d like to add notes, you can add them to the bottom left. There is also a spot for banking details.

That’s it. You now have everything you need in the invoice to send it out to your customers
Step Five – Preview Your Invoice
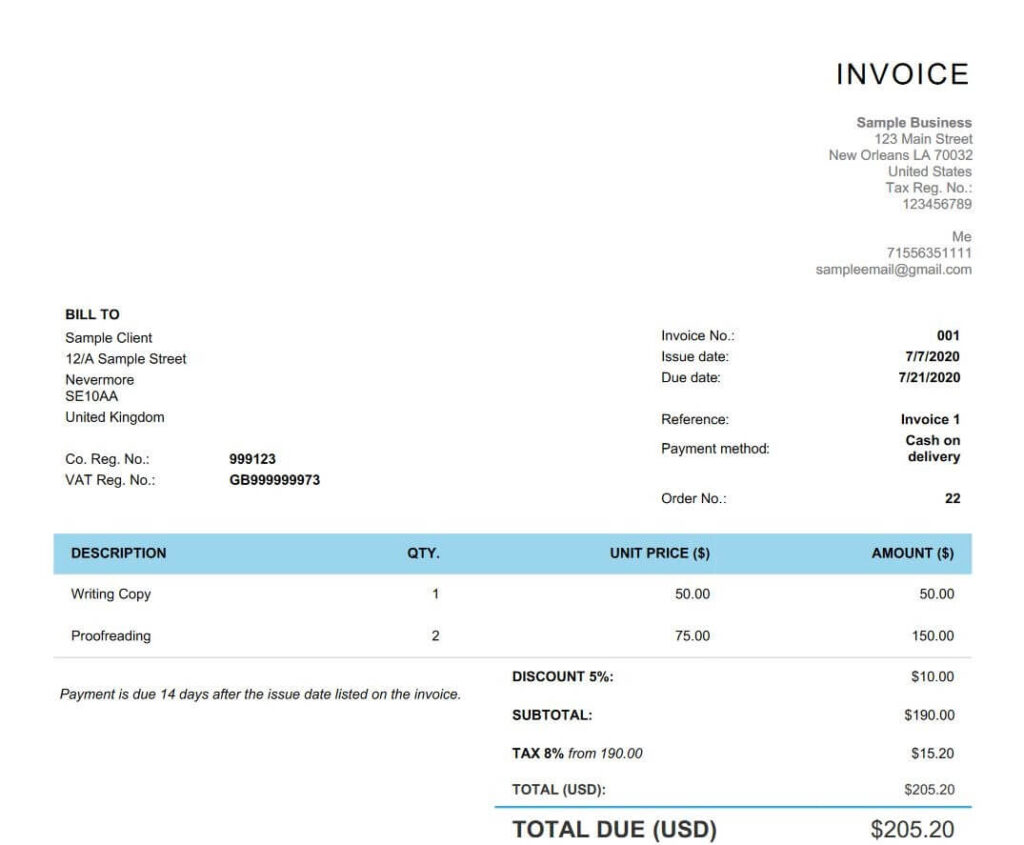
You should never send your invoice out without previewing it first. This gives you a few minutes to look everything over and make sure you haven’t accidentally missed anything or left important information out. You can go back and edit it if you like, save it, download as a PDF, duplicate it, set a reminder, or delete it.
Important Elements to Include on Your Invoice
Now that we’ve walked you through how to create an invoice using Billdu, we’ll go over several important elements that are absolutely vital to have on your invoice. These are the things you have to double-check for when you preview any invoice you make to ensure you don’t skip them. They include:
- A unique invoice number/identifier
- The word “Invoice” so your customers know what it is and you can tell the difference between an estimate or quote
- Date of the invoice
- Your information – address, name, and phone number
- Customer’s information – address, name, and phone number
- Taxes
- List of services or products with the cost
- Payment information and terms
- Payment instructions
Billdu Can Help Track Your Invoices
When you create invoices using Billdu’s software, you get a dashboard with all of your invoices listed on it. You can sort them into paid, unpaid, and overdue lists to make it easy to find the customers that you have to contact for payment.

This makes it very easy to keep your business’s finances in order. When your customers pay you, you can update the invoice so it goes into the paid list. You can search by invoice number or filter them by year if you have to go back and look for an older invoice for tax purposes or if a customer has a question.
Create and Track All of Your Expenses with Billdu
Along with invoices, Billdu can help you create and track estimates, pro forma invoices, purchase orders, delivery notes, credit notes, recurring invoices, expenses, and more. We have several free generators available that you can use to help keep your business finances in order, including:
- Pro Forma Invoice Generator
- Estimate Generator
- Purchase Order Generator
- Delivery Note Generator
- Credit Note Generator
Once you create your invoice or other documents, you can create an account and sign up for a free trial to try Billdu a week with no additional costs to you. We encourage you to try it and see how it can streamline your finances today!


